
This section explains how to use THSS to enter scores for responses, mark responses as complete, and reassign responses to other Scorers.
After you log in, the Response List page appears. The table on this page populates with the responses assigned to you to score. You can use the navigation links in the bottom-right corner to view all the responses in the list.
Figure 1: Response List Page
Table 1 describes the columns in the Response List table.
| Column | Description |
|---|---|
| Name | Name of the student. |
| Item | Name of the hand-scored item. |
| Session | ID of the session in which the student completed the test containing this response. |
| Date Received | Time and date (based on your time zone) on which the item response was added to the system. |
| Status | “Not Scored” indicates the response still needs to be scored. “Tentatively Scored” indicates the response was scored but still needs to be marked as complete. |
| Assigned To* | The Scorer to whom the response is currently assigned. |
| Score | Click the Score button in this column to enter a score for the response. If you are a Score Manager, you can only enter scores for responses that are assigned to you. For more information, see the section Scoring Responses. |
| *This column only appears in the Response List table for Score Managers. | |
You can use the drop-down lists on the Response List page to filter the responses that appear in the table. Scorers can filter the table by test, session, and items. Score Managers can filter the table by test, session, grade, subject, assigned Scorer, and item.
To filter the list of items:
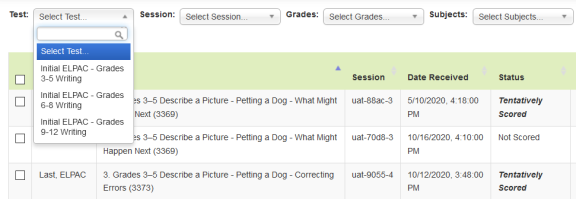
Figure 2: Test Filter
The Select Test option will provide you with the default view.
You can sort the Response List table by student name, item, session ID, or response status.
To sort the table by one of these columns: