Customize Search Results Grids
Many tasks in TIDE involve searching for records. Often, the search results contain many results that may need to be reorganized to meet your information needs. You can change the view of the results, hide or show columns, and change visual aspects of the grid, such as the text size.
Note: These features vary across tasks, so not all search results grids will have each feature.
Change the View
This feature is only available for the Manage task
There are two options to change the way the grid displays information on the student search results grid.
-
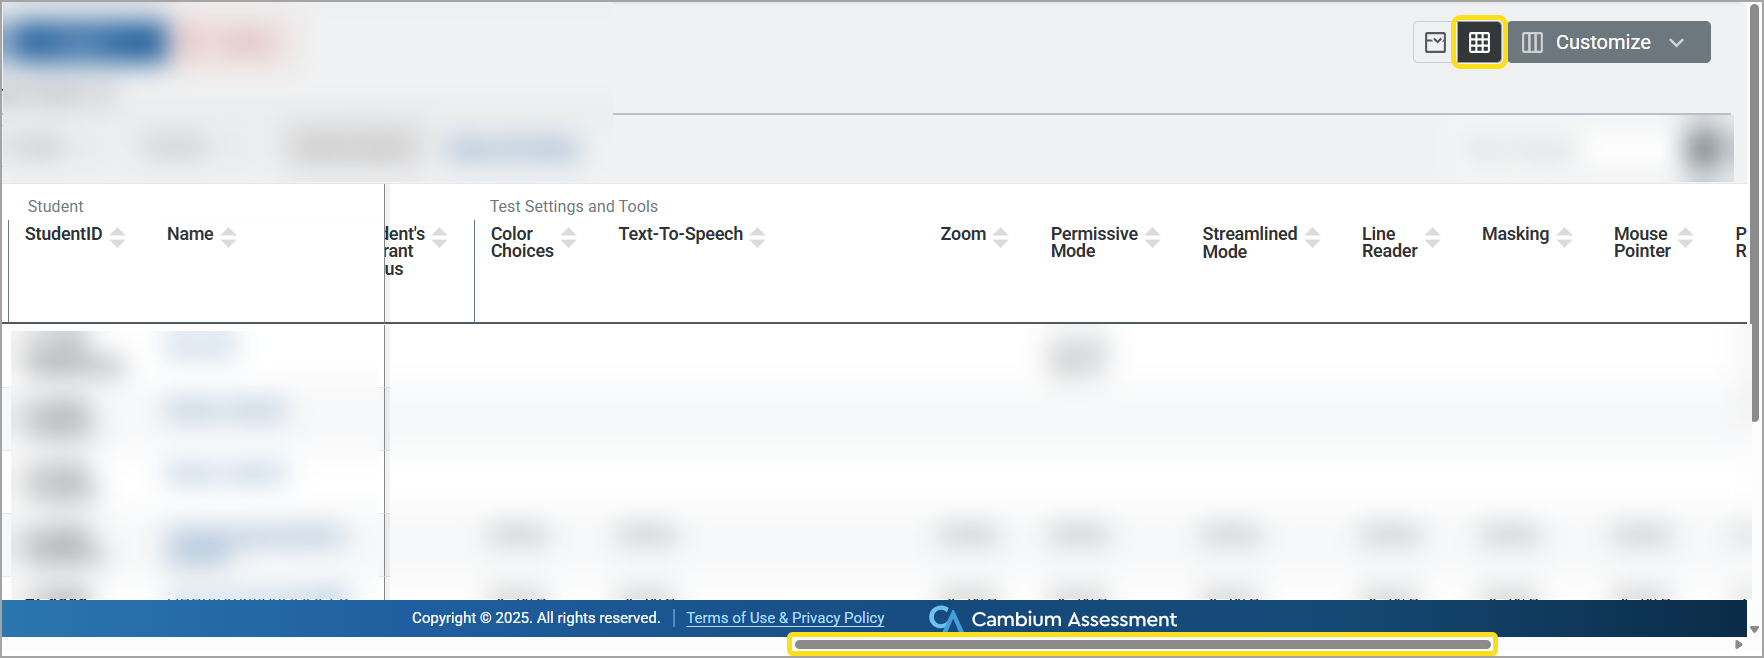
 Grid view is the default view and requires horizontal scrolling to review information for the records. The Student ID and student's name appear stationary on the left as you scroll through the rest of the information. The horizontal scroll bar is at the bottom of the screen under the footer.
Figure 12: Grid View Button and Horizontal Scroll Bar Highlighted in Yellow
-
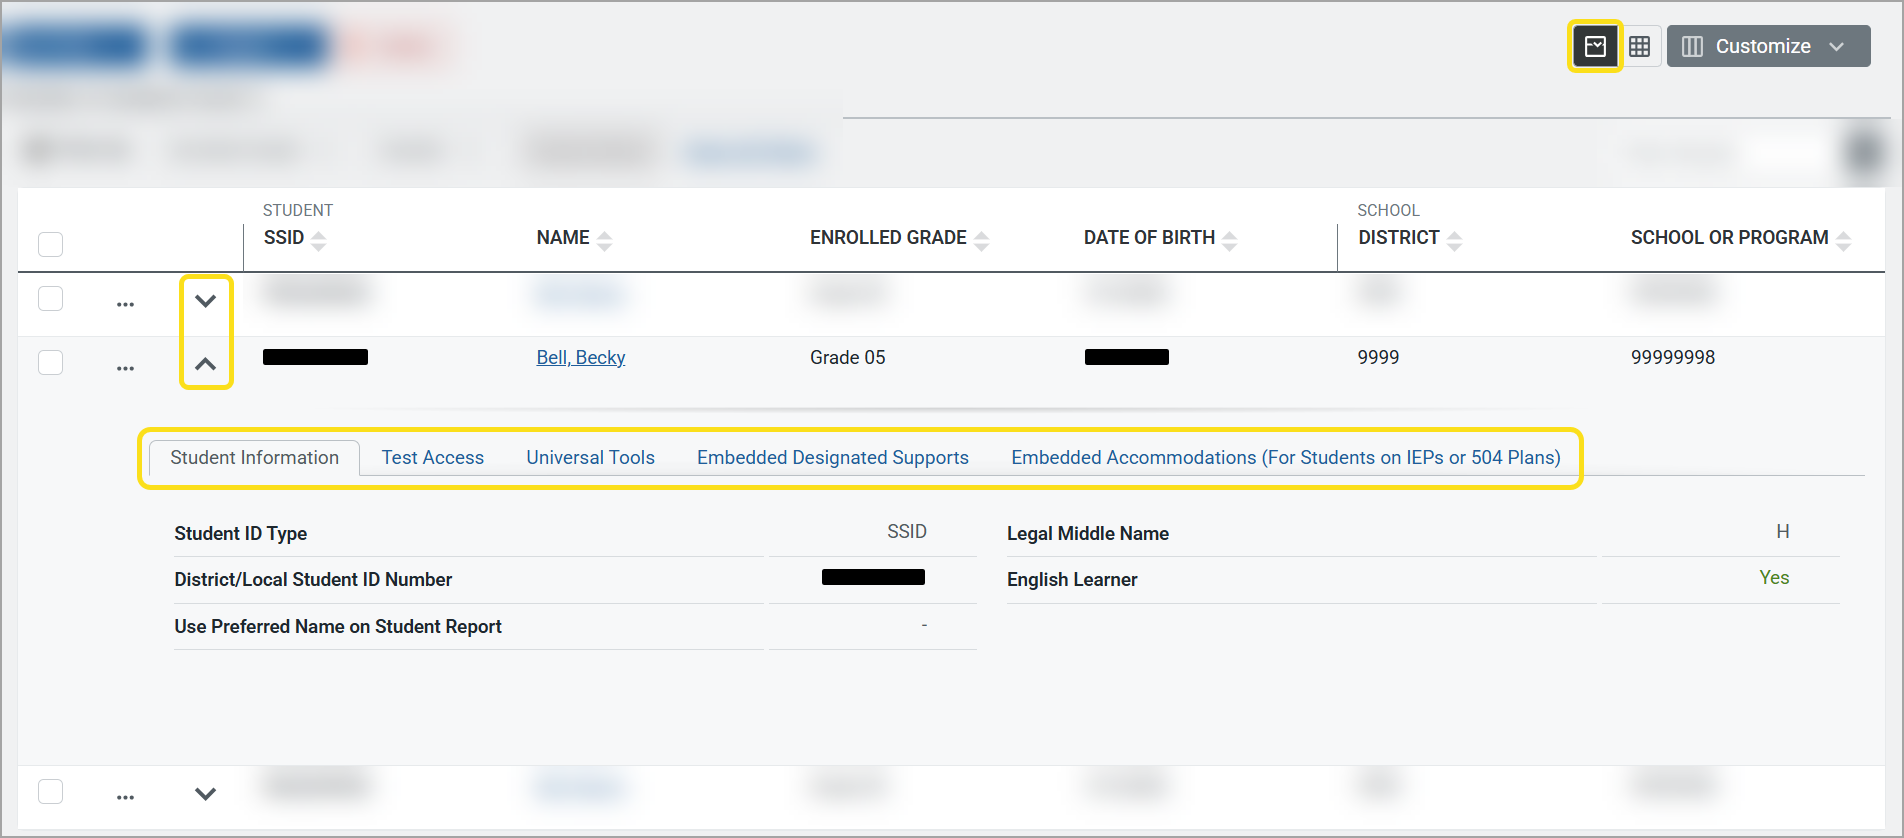
 Focus view allows you to easily review basic information about the records, such as Student ID, name, grade, and date of birth, to find the records you need. There is no horizontal scrolling with this view. Once you identify a record you need, use the dropdown arrow to expand the row to access additional information about the record. The information is presented across tabs to allow you to focus on just what you need.
Figure 13: Focus View Button, Arrows, and Tabs Highlighted in Yellow
Customize the Visual Components of the Grid
Select Customize to change the visual appearance of the search results grid. The options available for the Customize menu depend on the view you are using.
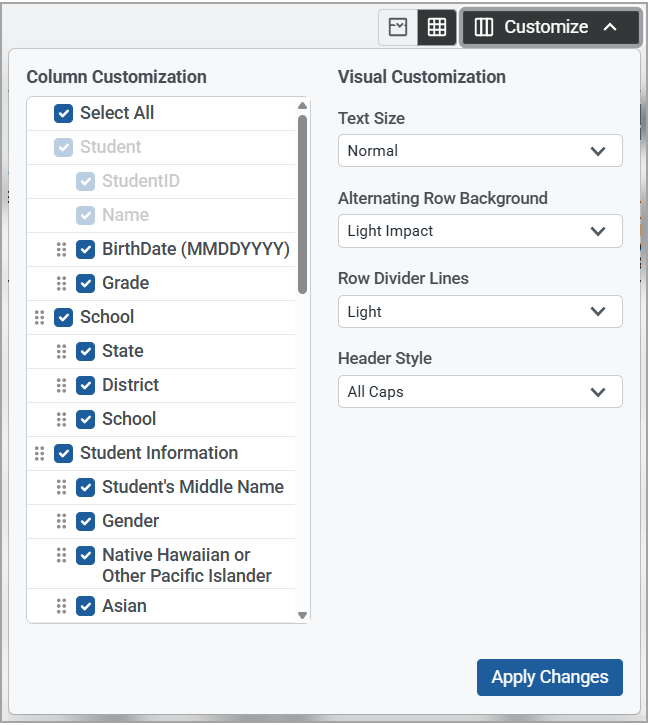
Both views offer ways to customize the visual presentation of the grid to change the text size, row background, divider line weight, and style of the text at the top of each row (Figure 14). However, only the grid view offers the ability to show and hide columns, as well as move them to create a different order of columns (Figure 15).
Figure 14: Customize Menu Open to Display Options in Focus View
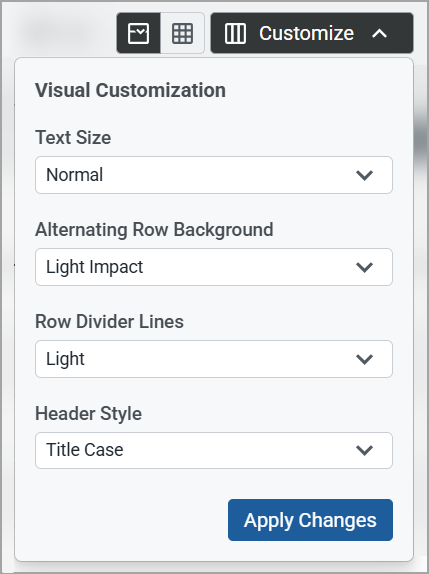
Figure 15: Customize Menu Open to Display Options in Grid View
Visual Customization Options
Use the visual customization dropdowns to make changes. Then select Apply Changes.
In the list that follows, the default options are highlighted in bold. Your customizations only apply to the current task and need to be reset each time you access a task.
-
Text Size: Large, Normal, Small, Extra Small
-
Alternating Row Background: Light Impact, Heavy Impact, None
-
Row Divider Lines: Light, Dark
-
Header Style: All Caps, Title Case
Column Customization
There are two ways to customize the columns: by hiding or displaying them, and by rearranging their order.
To hide columns on the grid, simply clear their checkboxes and select Apply Changes. To display them again, select the checkboxes and then Apply Changes.
On the grid, columns are organized into sections so related information stays grouped together. The sections display above the columns (Figure 16).
You can customize the layout by rearranging entire sections or moving individual columns within a section. In the customize menu, sections are left-aligned, with their columns indented beneath them.
Figure 16: Grid Header with Sections Highlighted in Yellow

To move a section or column:
The option to drag and drop sections and columns is only available on the student search results grid.
-
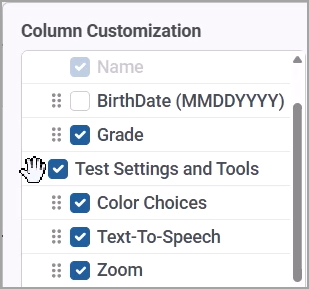
Next to a section or column, hover your mouse over the move icon
 until your cursor changes to a hand.
 Figure 17: Column Customization Showing the Move Hand Icon over a Section
-
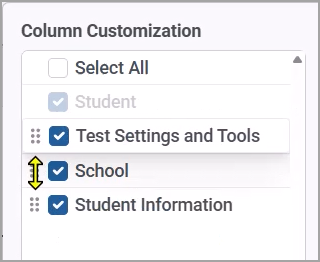
Click and drag the section or column to the location you'd like. The cursor will change to a double-tipped arrow as you move it.
For sections: when you start to move a section, all sections collapse so you can more easily place the section.Figure 18: Collapsed Sections with Cursor as Double-Tipped Arrow Highlighted in Yellow
-
Release the section or column where you'd like it to display.
Tip: If you're using a tablet, you can tap, hold, and drag the section or column.
The Student section is the only one that cannot be hidden or moved. It is also the only section with columns that cannot be fully customized, as the Name and Student ID checkboxes are grayed out and cannot be hidden or moved.
Alert: Columns do not export in the customized order.