Interaction Assertions Sub-Tab
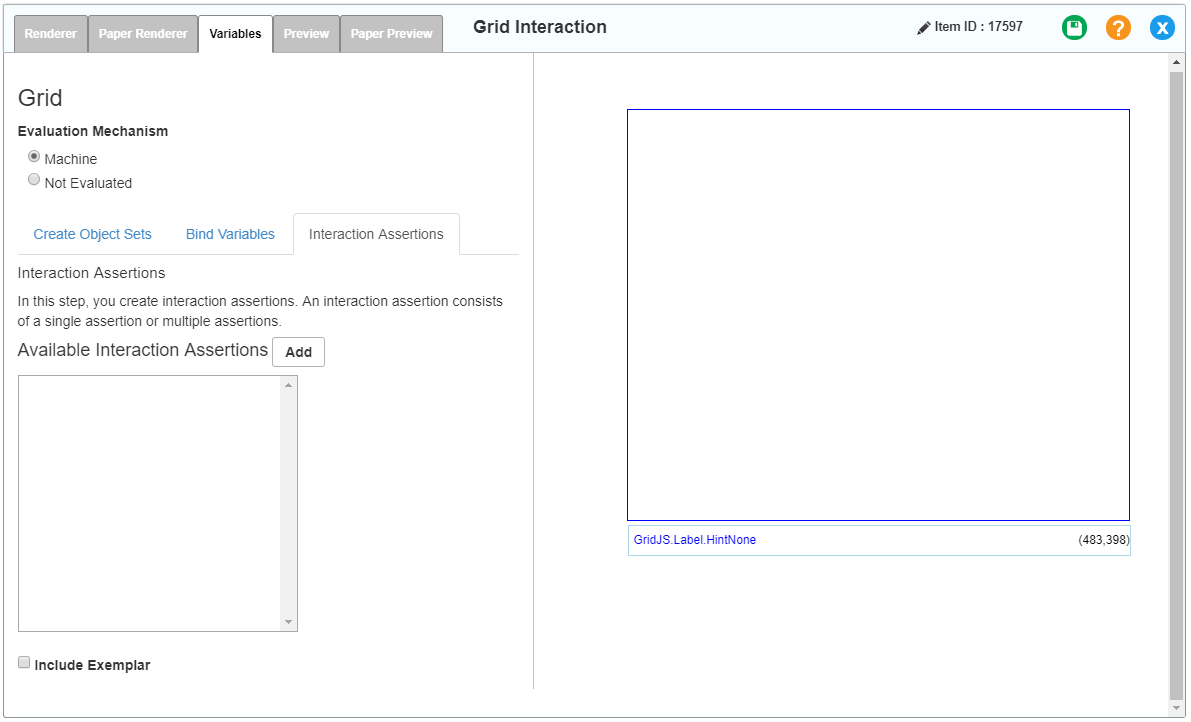
The Interaction Assertions sub-tab (Figure 17) allows you to define assertions, which the machine rubric uses to evaluate the variables. Assertions consist of properties that determine whether a student response is correct, incorrect, or partially correct.
The assertions you define in this tab are sent to the Rubric Editor tool, where they are used to create scoring expressions.
Figure 17: Grid Interaction Editor Window: Standard Grid: Variables Tab: Interaction Assertions Sub-Tab
You can manage an assertion’s properties in the Interaction Assertion panel. The appearance and functionality of the Interaction Assertion panel are similar to those of the Object Set panel on the Create Object Sets sub-tab (refer to Create Object Sets Sub-Tab).
Figure 18: Grid Interaction Editor Window: Variables Tab: Interaction Assertions Sub-Tab: Interaction Assertion Panel
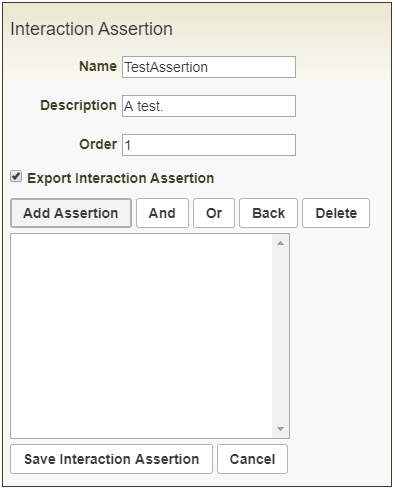
Features of the Interaction Assertion panel (Figure 18) include:
- The Name field allows you to enter a name for the interaction assertion. This name must be unique and cannot contain spaces.
- The Description field allows you to enter a description for the interaction assertion.
- The Order field allows you to enter the order number for the assertion. The machine rubric evaluates interaction assertions in the order you specify.
- The Export Interaction Assertion checkbox, when marked, sends the assertion to the Rubric Editor, where it is used to create scoring expressions.
- The Add Assertion button adds a new property to the assertion and opens the Object Property window.
- The And operator button combines properties into a group in which all affiliated properties must be satisfied for the assertion to be true.
- The Or operator button combines properties into a group in which only one affiliated property must be satisfied for the assertion to be true.
- The Back button is not used.
- The Delete button at the top deletes the selected property or operator.
- The Assertion list displays the properties and operators added to the assertion. You can click an element in this list to modify or remove it.
- The Save Interaction Assertion button saves the interaction assertion.
- The Cancel button closes the panel without saving changes.
- The Delete button at the bottom (not shown in the figure) appears after you’ve saved. It deletes the interaction assertion.
To create a new interaction assertion:
1.In the Interaction Assertions sub-tab (Figure 17), click Add. The Interaction Assertion panel appears (Figure 18).
2.In the Name field, enter a unique name for the assertion.
3.In the Description field, enter a description for the assertion.
4.Click Add Assertion. The Object Property window appears
5.Enter a description for the assertion property in the Description field.
6.Select a category from the Category drop-down list (the options in this list depend on the interaction type).
7.Select a property from the Property drop-down list (the options in this list depend on the selected category). A description of the property appears, along with any associated parameter fields.
8.Set parameters for the property and click Save. The property appears in the Interaction Assertion panel.
9.To create additional properties, use the operator buttons in the Interaction Assertion panel as necessary. Repeat steps 4–8 for each property.
10.When you are finished defining properties for the interaction assertion, click Save Interaction Assertion at the bottom of the panel. The assertion appears in the Available Interaction Assertions list on the Create Interaction Assertions sub-tab.
11.To save the interaction, click ![]() in the upper-right corner. Click OK in the confirmation pop-up that appears.
in the upper-right corner. Click OK in the confirmation pop-up that appears.