Inserting a Table
To insert a table with the CKEditor:
1.Click  . The Table Properties window appears, open to the Table Properties tab (Figure 221).
Figure 221: Table Properties Window: Table Properties Tab
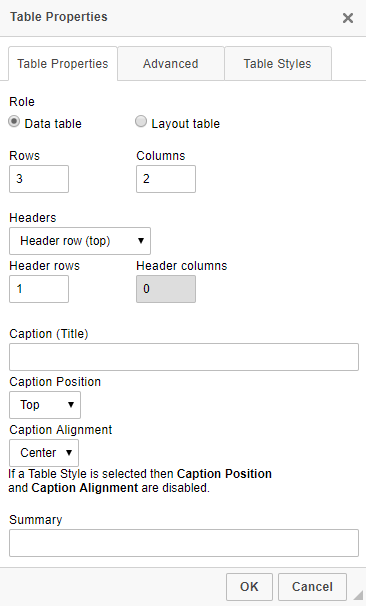
2.Optional: To modify the table properties, do any of the following:
- To set a role for the table (either layout table or data table) mark the required Role radio button. A layout table is used to align elements such as images and text. It cannot contain any data generated by the student.
- To specify the number of rows in the table, enter a value in the Rows field.
- To specify the number of columns in the table, enter a value in the Columns field.
- To include column and/or row headers in the table, select the option you prefer from the Headers dropdown list.
- To add a caption to the table, enter text in the Caption field.
- To set the placement of the caption, select options from the Caption Position and Caption Alignment dropdown lists.
- To add a summary to the table, enter text in the Summary field.
- To shade the header cells in the table, click the Advanced tab (Figure 222) and mark the Shade Header Cells checkbox. This checkbox is only available if no table styles are applied.
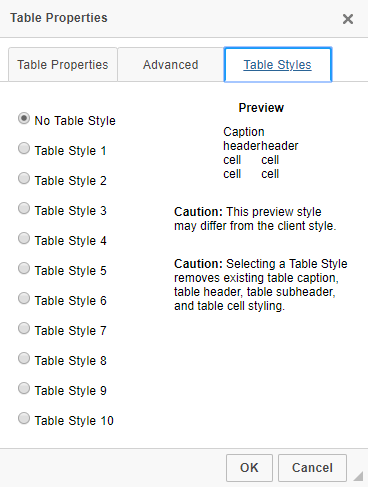
- To style the table, click the Table Styles tab (Figure 223) and select a style.
Figure 222: Table Properties Window: Advanced Tab

Figure 223: Table Properties Window: Table Styles Tab
3.Click OK. The table appears.
4.Optional: To edit the table, right-click inside it and select Table Properties. The Table Properties window appears again. The Rows and Columns fields, as well as all the header settings, are grayed out and uneditable, since the table has already been created. Make edits and click OK.
5.Optional: To modify the number of rows and columns in the table, right-click inside the row or column where you want to make the changes, or alternatively select multiple rows or columns and right-click. Then use the options under the sub-menus Row or Column:
- To add a new row after a given row, select Row > Insert Row After.
- To add a new row before a given row, select Row > Insert Row Before.
- To delete a row, select Row > Delete Row.
- To add a new column after a given column, select Column > Insert After.
- To add a new column before a given column, select Column > Insert Before.
- To delete a column, select Column > Delete Column.
6.Optional: To modify cells, right-click inside the cell where you want to make the changes and use the options under the sub-menu Cell:
- To add a new cell to the left of a given cell, select Cell > Insert Cell After.
- To add a new cell to the right of a given cell, select Cell > Insert Cell Before.
- To merge multiple cells, select the cells, right-click inside one, and select Cell > Merge Cells.
- To merge a cell with the one below it, select Cell > Merge Below.
- To merge a cell with the one to its right, select Cell > Merge Right.
- To split a cell horizontally (making it into two cells side by side), select Cell > Split Horizontally.
- To split a cell vertically (making it into two cells one above the other), select Cell > Split Vertically.
- To delete a cell, select Cell > Delete Cells.
- To delete multiple cells, select the cells, right-click inside one, and select Cell > Delete Cells.
7.Optional: To style the borders of an individual cell, right-click inside it and select Cell > Cell Properties. The Properties For Cell At [Position] window opens. Click the Borders tab. Note that if a style has been applied to the whole table, the Borders tab controls will be disabled. Note also that you cannot style the borders for an entire row or column at once.
- To edit all the cell’s borders at once, click the thick borders
 , thin borders
  , or no borders
  buttons.
 - To edit individual borders, use the Top, Bottom, Left, and Right dropdown lists and select None, Thin, or Thick.