Appendix F: Creating Human Voice Recording (HVR)
IAT allows you to add human voice recording (HVR) to certain types of interactions as a student accommodation. Adding HVR in IAT entails entering the text of the script and recording it with a microphone, or, alternatively, using text-to-speech.
Item writers should have no need to add HVR scripts or recordings, because these tasks are performed by other users.
These instructions apply generally to all interaction types. Some interactions allow you to create HVR regions per paragraph, while others allow you to create HVR per entire interaction.
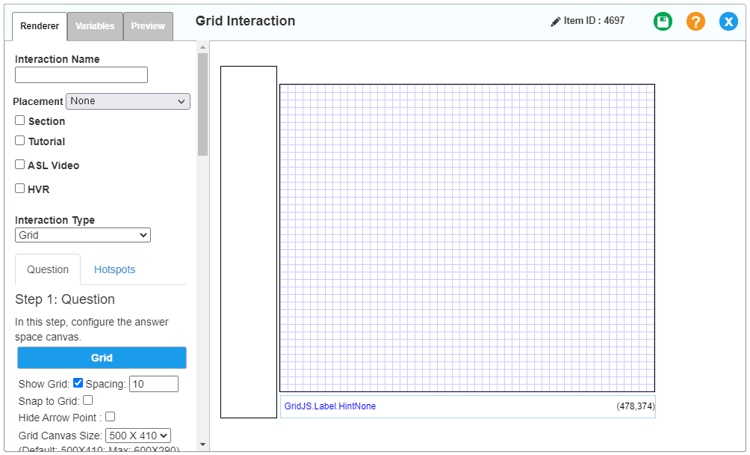
Figure 287: Grid Interaction Editor Window: Renderer Tab
1.Select whichever of the following options is available:
- When using a CKEditor, select the paragraph that you want to wrap in an HVR region. For help using the CKEditor, refer to Appendix A.
- Select the HVR checkbox in the Configuration panel of an interaction (Figure 287). This adds HVR to the whole interaction and opens the HVR Widget window, as shown in Figure 288. Skip to step 3.
2.Click the HVR button  in the CKEditor toolbar. The region is wrapped in a dotted line and the HVR Widget window appears.
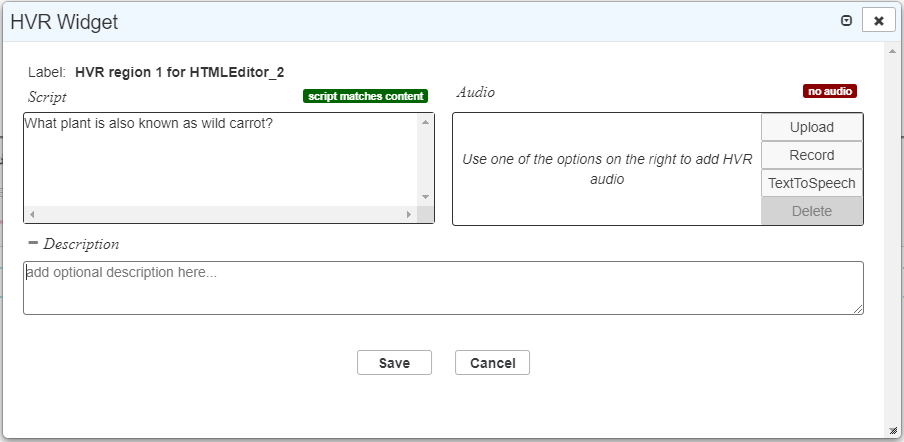
3.Optional: In the Script field on the left, using the simplified CKEditor, edit or replace the text of the script. For help using the CKEditor, refer to Appendix A. A message in red appears above the field, indicating that the script differs from the content.
a.Optional: If you've edited the script and want to automatically regenerate it, click Sync above the Script field. Note that this will overwrite your work.
b.Optional: To add a description of the script, click Description. A field appears in which you can enter text. You may want to do this if the script differs from the original text and you want to explain it to reviewers, or if you make updates to the script after reviews.
4.Choose one of the following three things (uploading, recording, or generating text-to-speech):
i.Click Upload. (Once an audio file is present, this button will change to say Edit.) The Media Upload: Audio window appears.
ii.Follow steps 2–4 under Inserting Audio in Appendix A.
i.Click Record. A microphone button  and a play button
  appear, as in Figure 289.
Figure 289: HVR Widget Window with Recording Controls
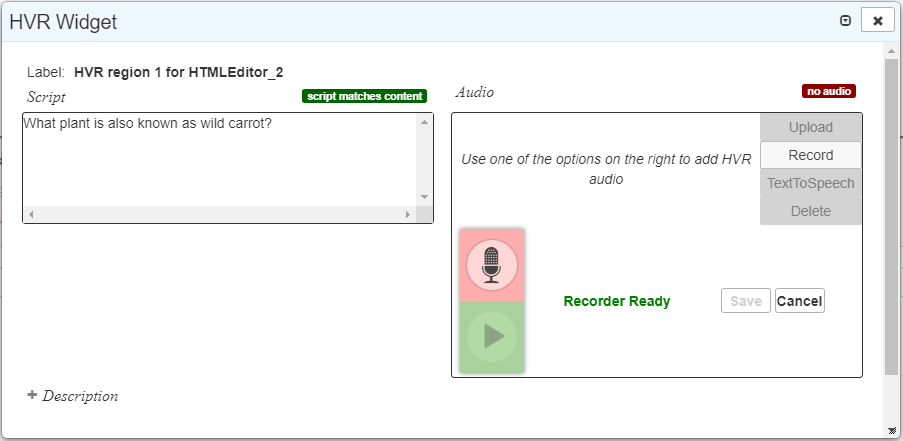
ii.Click the microphone button to start recording. A stop button  appears in its place, and recording begins immediately.
iii.Read the script aloud exactly as it is written.
iv.Click the stop button to stop recording.
v.Click the play button to listen to your recording.
vi.Optional: If you're not satisfied with your recording, repeat recording steps ii–v to overwrite it with a new one. Alternatively, you can edit the audio by first saving the audio as described in the next step, then following the instructions in step 6.
vii.Click Save. In the confirmation pop-up, click OK. The recording appears.
i.Click TextToSpeech. Text-to-Speech controls appear, as shown in Figure 290.
Figure 290: HVR Widget Window with Text-to-Speech Controls
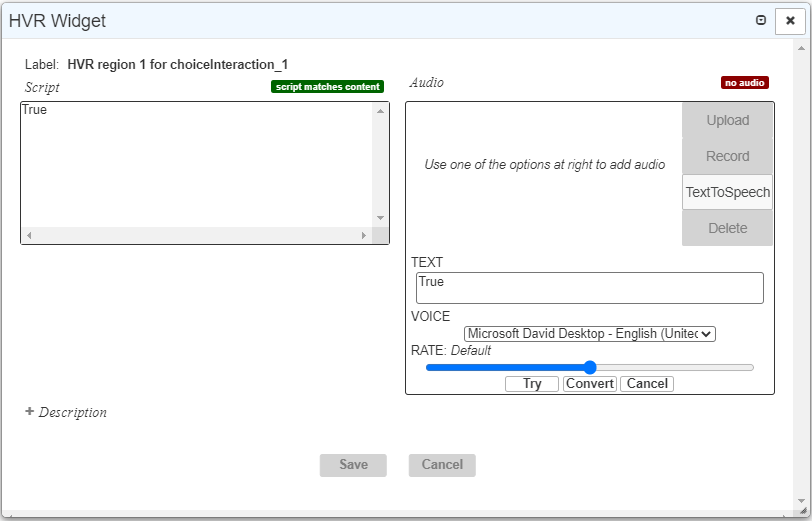
ii.From the VOICE dropdown list, select the voice you want to use (Microsoft David or Microsoft Zira).
iii.Using the RATE slider, choose the speed at which you want the Text-to-Speech software to read the text. The slider goes from slowest on the left to fastest on the right. You can move the slider by clicking and dragging or, alternatively, by using the up and down arrow keys when the slider is in focus.
iv.Click Try to listen to the software read the text.
v.Optional: If Text-to-Speech is mispronouncing some words, then in the TEXT field, select those words and spell them phonetically. Repeat the previous step.
vi.If you're satisfied with the reading, click Convert. The audio file is generated. In the confirmation pop-up, click OK.
5.Optional: To delete the audio, click Delete.
6.Optional: To download the audio, click the shish kebab button  on the right side of the recording and select Download from the menu that appears. You can edit the audio in another application, then upload your edit using the instructions above (upload steps i–iii).
7.To save the HVR content, click the Save button at the bottom of the window.
8.Optional: To change the HVR content you created, do one of the following:
- If the HVR content is per region, select the region and click the HVR button again.
- If the HVR content is for the whole interaction, click launch widget beside the HVR checkbox.
9.Optional: If the HVR content is per region, then to edit all HVR regions in the current CKEditor at once, click the list HVR regions button  .
.
10.Optional: If the HVR content is per region, then to remove an HVR region, click inside the region, then click the remove HVR region button  .
.
A script icon ![]() and/or a recording icon
and/or a recording icon ![]() appear wherever HVR content exists. An example of an HVR region is shown in Figure 291.
appear wherever HVR content exists. An example of an HVR region is shown in Figure 291.
Figure 291: HVR Region with Script and Recording
